APISIX:如何在VSCode搭建调试环境
由于APISIX集成了大量的基础库和优秀设计,很多时候我们在运行功能模块的时候,需要了解代码是怎么跑起来的,所谓源码之下无秘密,今天来看下如何在VSCode环境对APISIX进行单步调试。
前言
Step0: precondition
前置条件:由于APISIX是基于Lua5.1+LuaJIT进行开发,所以在VSCode的集成Lua插件处需要设置默认运行Lua环境
![]()
Step1: debug plugin
-
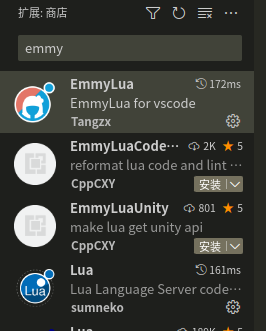
打开VSCode扩展程序,安装emmyLua插件

-
设置lanch.json配置项,参考官方手册
{
    // 使用 IntelliSense 了解相关属性。
    // 悬停以查看现有属性的描述。
    // 欲了解更多信息,请访问: https://go.microsoft.com/fwlink/?linkid=830387
    "version": "0.2.0",
    "configurations": [
        {
            "type": "emmylua_new",
            "request": "launch",
            "name": "EmmyLua New Debug",
            "host": "localhost",
            // 此端口号需与程序监听一致
            "port": 8172,
            "ext": [
                ".lua",
                ".lua.txt",
                ".lua.bytes"
            ],
            "ideConnectDebugger": false
        }
    ]
}
Step2: program init
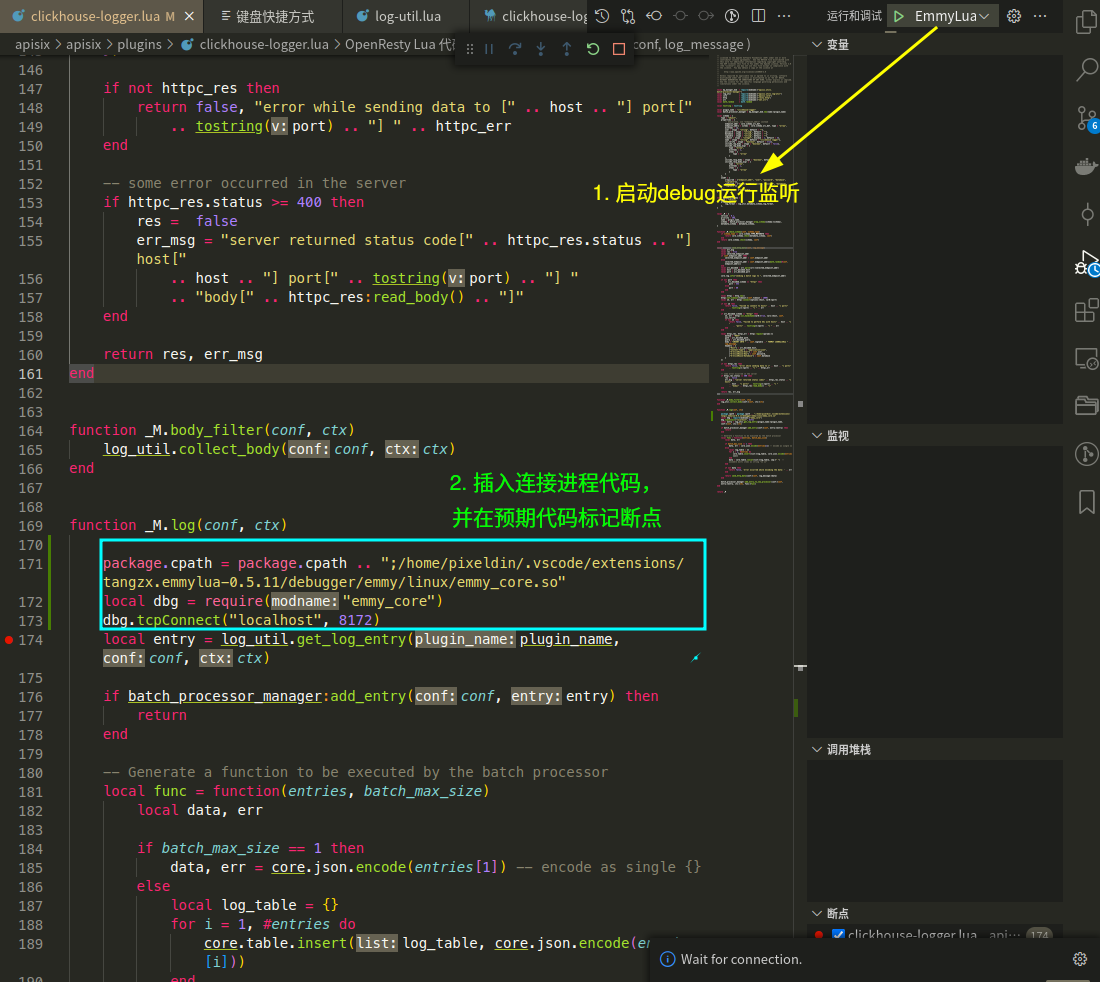
- 点击VSCode程序启动调试
- 插入emmyLua代码片断
package.cpath = package.cpath .. ";/home/pixeldin/.vscode/extensions/tangzx.emmylua-0.5.11/debugger/emmy/linux/emmy_core.so" local dbg = require("emmy_core") dbg.tcpConnect("localhost", 8172) - 标记断点

Step3: Running with source code
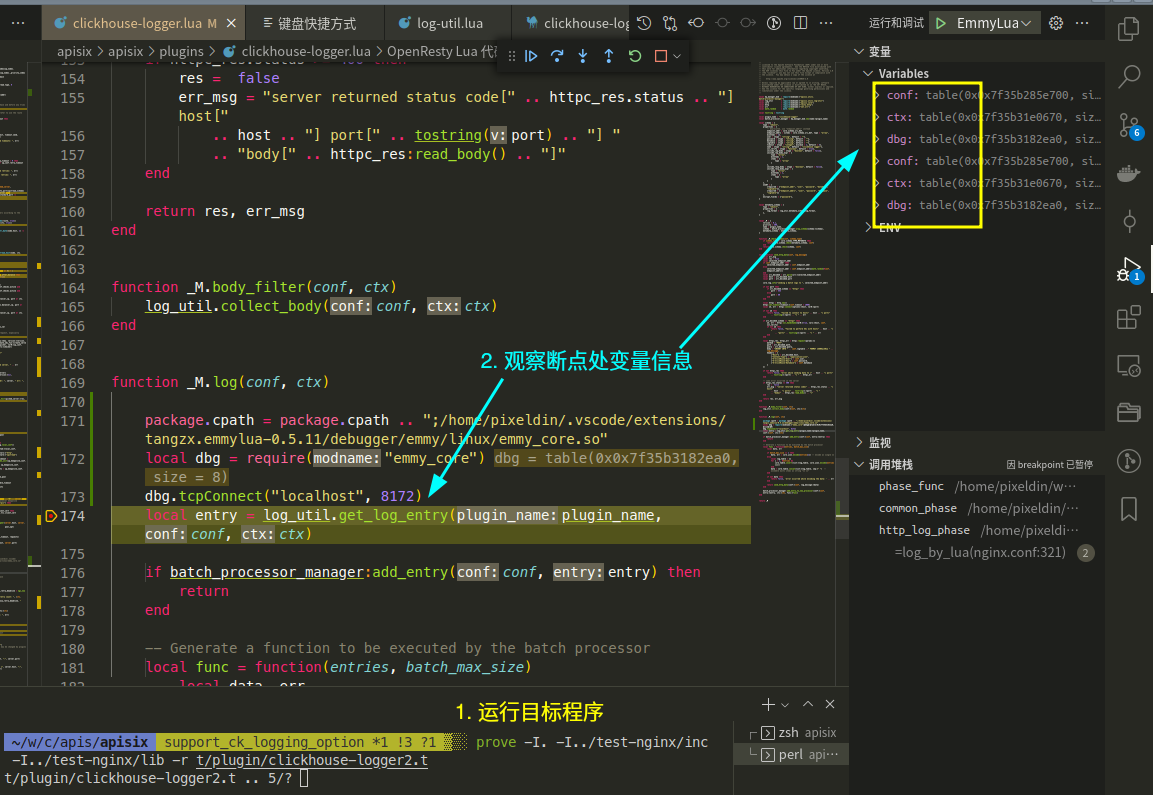
- 启动APISIX覆盖标记断点代码,观察堆栈信息和关注变量,(官方项目提供了很多单元测试文件,可以配合
test-nginx的单元测试perl脚本运行)
参考链接
- APISIX Runtime Debug/动态调试
https://juejin.cn/post/6951650129044570125